|
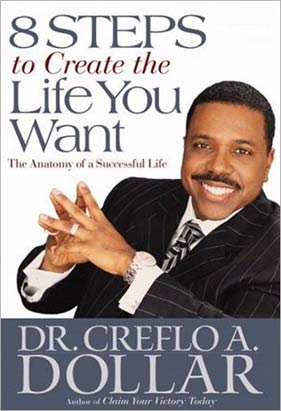
To The Gullible Sheep In Your Average Congregation. (Danger Signs To Look Out For) He's Got Teddy Haggard's Smile Formerly
'Bette Davis Eyes' Songwriters: WEISS, DONNA / DE SHANNON, JACKIE New Lyrics By Bj Maxwell Thankyou Lord For This Gift Feel Free To Post Unaltered
Anywhere. Old Lyrics In ' '
New Lyrics In Black Links In Green
Hold Down The Shift Key, Click Here, Then Minimize To Sing The New Lyrics With Music. If You Need Help Singing This,
Scroll To End Of Song, Click Link And Bj Will Help You Sing It. He's Got Teddy Haggard's Smile "Too much smiling can be viewed as a sign of shallowness
or dishonesty" (Non Verbal Communication Methods)
His Smile Is Getting Old 
He Looks Like Gomer Pyle 
Grins While He's Being
Cold 
He's
Got Teddy Haggard's Smile 
He'll Turn The Spotlight On You  And Say He Isn't Vile (2 Tim. 3:5) 
He's Pure As Yellow Snow  He's Got Teddy
Haggard's Smile  He Will Choose You Then Just Use You (2 Tim. 3:5) And
When Finished, Will Accuse You He's 'Precocious', Thinks
He Knows Us And What It Takes To Snow Us. 
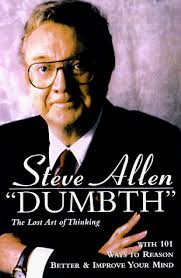
Behind His P.H.D. Its Piled
High  He's Got A Heady Braggard Style. 
He'll Speak
Of His Degree, Thinks That Trumps Lifestyle. (1 Tim. 3:6-10)
Then Promote His DVD's 
On The Front His Plastic Smile  (Kevin Grinner) 
He'll Super Apostle On You (2 Cor. 11:1-15)
Hope Your Dumb As Sheep, He's Rarely Feels Your Pain 
Rarely Walks That Extra Mile  Seminary, Cemetary Repeats His Tweets Like A Canary. 
He's Flirtatious And He 'Knows Just
What It Takes To Make The Girls Gush.' 
With
Dudley Spew Right Smile 
But With Teddy Haggard's Style. 
Outsides Cheesy

Insides Stinky 
Like Fools Gold Plaited Feces He's Above Us And He
Shoves Us And Tells The Rest He Tough Loved Us. 
In True Ivory Tower Style He's Got Teddy Haggard's Smile. 
He'll Quote You Then He'll Goad You Then Demote You
With Heady Braggard Style 
(Kevin Grinner)
Truman Shows You And He Snows You Then Dispose You With A Teddy Haggard
Smile 
(Kevin Grinner) If You Need Help,
Click Here, Minimize, Then Listen To Bj Sing The New Lyrics Above. New Lyrics By Bj Maxwell 04/16/2013 04/17/2013 Copyright © 'We all want to be a servant – until
we are treated like one. We all want to be fools for Christ – until we look foolish. We all want to be humble
– until our pride gets hurt.' (Kevin Grenier)
Superficial
Remember The Days When People Communicated In Words And Complete
Sentences Not Individual Letters (OMG) And Texts, And Folks Watched The Boob Tube Not You Tube, And The Ones Appearing
To Talk To Themselves Were The Mentally Ill, Not Just Someone Lip Syncing The Music On Their Headphones?
Here's An Oldie Out Before The Internet And You Tube And When Folks Had Attention
Spans Longer Than Thirty Seconds.
Let Me Get The Record Player Started.
Click Here, Then Minimize To Read New Lyrics With Music.
Listen To The Famous Superstitious Riff/Lick Four Times, Then When He Adds The Melody
On The Guitar, Start Singing.
Guitar By Adam Rafferty
New And Improved Lyrics By Bj Maxwell
Feel Free To Post Unaltered Anywhere.
Formerly Superstition Sung By 'Stevie Wonder'
New Lyrics In Black
Links In Green
Superficial
New Lyrics:
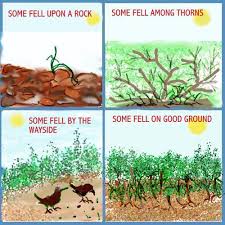
Very Superficial, Talkin To A Wall.

Very Superficial, Little Soil, Will Fall
(Matt. 13:3-9)
Just Like Little Alice, Through The Lookin Glass.

Her World View Distorted, None Of That Will Last

When You Believe In Things That You Cannot Defend.
That's Just Shallow

Superficial Ain't The Way
Very Superficial, 'Wash Your Face And Hands'
Rabbinic Tradition Says: Wash Them Again.

Keep You In Their Circle, Phasebook Then Click Like.

You Don't Wanna Hear This, Too Hard Is This Rewrite.
But When You Believe In Things You Cannot Defend.
That's Just Hollow

Superficial Ain't The Way, Yeh, Yeh:
Instrumental:
Listen To The Famous Superstitious Riff/Lick Four Times, Then When He Adds The Melody
On The Guitar, Start Singing.
Very Superficial, Tweetin Everyday
Biblically Official, Satan's On His Way.
(2 Thess. 2:3-11)

Thirty Year Old Babies, Living Shallow Lives.
Talk Show Hosts Their Heroes, Bimbo's Are Their Wives.

When You Believe In Things That You Cannot Defend.

That's Just Shallow

Superficial Ain't The Way, No, No, No

Very Superficial, Dumbing Down The Songs.

All About Appearance, Nothing Deep Or Strong
Thirty Year Old Babies, Change Their Diapers Fast.

'Get No Satisfaction' , It Won't Even Last

When You Believe In Things That You Cannot Defend

Then That's Hollow
Superficial Ain't The Way
Instrumental:
Listen To The Famous Superstitious Riff/Lick Four Times, Then When He Adds The Melody
On The Guitar, Start Singing.
Very Superficial, OMG, Not Words
He's Just Got A Minute , Thinking Is For Nerds
They're Just In A Thick Fog, Talking All Alone..

Then You Find Out, They're Talking On Head Phones.

When You Believe In Things That You Cannot Defend
Then That's Shallow
Superficial Ain't The Way, Yeh, Yeh

Very Superficial, No More To Be Said
Very Superficial, No More In Your Head

Thirty Year Old Babies, Ask Them How They Feel.
Even Wants To Know If, Their Cross Will Have Wheels
When You Believe In Things, That You Cannot Defend
That's Still Hollow
Superficial Ain't The Way, No, No, No
Instrumental:
Listen To The Famous Superstitious Riff/Lick Four Times, Then When He Adds The Melody
On The Guitar, Start Singing.
Very Superficial, Clean Outside The Bowl
Very Superficial, Forgot About The Hole

Rinos And B,Binos, Pro Life Not Pro Christ

Exercise The Body, Neglect The God Advice
When You Only Believe What You See With Your Eyes
Then You'll Suffer

Superficial Ain't The Way
Rid Us Of One Problem, Wack A Mole With Hand

Forgot About The Others, Wack Them If You Can
Keep You In A Stupor, With Beautiful Songs

But Their Songs Are Faithless, Words Are All Wrong

When You Only Believe What You See With Your Eyes

Then You're Faithless
Superficial Ain't The Way
Instrumental:
Listen To The Famous Superstitious Riff/Lick Four Times, Then When He Adds The Melody
On The Guitar, Start Singing.
Very Superficial, All Bout What You See

Very Superficial, Challenged Spiritually
Thirty Year Old Children, Selfish Little Brats

Outer Shell Looks Nifty, Inside Looking Drab
When You Only Believe What You See With Your Eyes

The Truman Show/Hollowwood
Then You're Hollow
Superficial, Ain't The Way
Very Superficial, Gained The World Lost Your Soul
Save You From Your Problems? , God Can Make You Whole

You're Still In A Daydream, It Won't Last For Long.
You Don't Wanna Hear Me, Hard Is My Song

When You Just Believe What You Can Hold In Your Hands

Then You're Shallow

Superficial Ain't The Way, Yeh, Yeh
Instrumental:
Listen To The Famous Superstitious Riff/Lick Four Times, Then When He Adds The Melody
On The Guitar, Start Singing.
Very Superficial, Focused On The West

Very Superficial, Neglect All The Rest
Like A Bull With Blinders, Sure To Break Some Stuff

Major On The Minors, All Bout Being Rough
When You Just Believe What You Can Hold In Your Hands
Then You're Shallow

Superficial Ain't The Way, No, No, No
End Of Lyrics
New Lyrics By Bj Maxwell
02/01/2012
02/09/2012
07/19/2012
Copyright ©
Want To Karaoke, Think You Can Do It As Well, Better And Just As Joyful, Be My Guest:
Click Here, Then Minimize To Read New Lyrics With Music.
"Then he said to Thomas, "Put your finger here; see my hands. Reach out your hand
and put it into my side. Stop doubting and believe." 28 Thomas SAID TO HIM, "MY LORD AND MY GOD!" 29 Then Jesus told him,
"Because you have seen me, you have believed; BLESSED ARE THOSE WHO HAVE NOT SEEN AND YET HAVE BELIEVED." 30 Jesus did many
other miraculous signs in the presence of his disciples, which are not recorded in this book. 31 But these are written that
you may believe that Jesus is the Christ, the Son of God, and that by believing you may have life in his name." (John 20:27-31)
"Now faith is being sure of what we hope for and CERTAIN OF WHAT WE DO NOT SEE. ...6
And without faith it is impossible to please God, because anyone who comes to him must believe that he exists and that he
rewards those who earnestly seek him." (Hebrews 11:1,6)
"Finally, brothers, whatever is true, whatever is noble, whatever is right, whatever
is pure, whatever is lovely, whatever is admirable--if anything is excellent or praiseworthy--think about such things. 9 Whatever
you have learned or received or heard from me, or seen in me--put it into practice. And the God of peace will be with you."
(Philippians 4)
To The Gullible Sheep In Your Average Congregation. (Danger Signs To Look Out For)
The Following Is Not A Condemnation Of Those Who Use Such Internet Services But
Of Those That Let It Diminish The Quality Of Their Spiritual Nourishment. Some Of The Points Are Funny, All Of Them
Are In Their Own Special Way, True.
You're A Tweetin, Textin, Bloggin, Tweekin, And Trippin Spiritual
Junk Food Junkie If:
1) IMHO And FWIW And AFAIK I'm Right And Twits Aren't.
2) You 'Endure Sound Doctrine' (2 Tim. 4:3,4 ) As Long As It Is Stated, Summed Up And Explained In Two Sentences Or Less.
3) That Tweekin And Trippin Brave New World Now Allows Your Pharmaceuticals/Drugs And Spiritual Journey To Ignorance, Bliss And Nothingness
Merge Into One Beautiful And Glorious Mess.
"Typical states would be "Unity-Consciousness," where one experiences a mystical union
with the universe and, "God-Consciousness" where one experiences that he himself is actually God. Similar "states of consciousness"
are experienced through certain drugs such as LSD, Hypnosis, Mediumistic Trances, Witchcraft Ceremonies, Voodoo etc., and
all seem to be slight variations of the same occult phenomenon."
http://www.flameministries.org/word.htm
http://www.the-new-way.org/testimonies/conv_hind_01_death_of_a_guru.html
4) You Only Read The Titles Of Messages, Then
Click 'Like'. You Also Include 'Like' In All Of Your Sentences As Well.
I Like You, I Don't Like You...Like Ad Infinitum, Like Ad Nauseum...Like Ad Upchuck'
5) You Wrongly Think That If Tweeting, Textin, Bloggin, Tweeking
And Trippin Was Good Enough For The Apostle Paul, Its Good Enough For You. (1 Cor. 6:12,13; 10:23 )
6) You Have A Liberal View Of Things Which Allows You To Redefine
Words (2 Corinthians 11:1-5, 13-15) When It Suits You. This Way You Always Have Something New To Say, Without Using New Words.
(Kingdom Of The Cults, Scaling The Language Barrier, Martin)
7) You Click 'Like' Because You
Really Like The Messenger Not Because The Message Is Good.
8) You Think That 'Big Brother' Is Either A Term Of Endearment Or
A Television Show.
1984 The Movie
9) You Believe Newspeak Is A Peek At The Top News For The Day.
10) O.M.G. Is As Worshipful As It Gets For You.

11) No Pain Is Really No Brain.
12) You Are Convinced That When Your Virtual And Spiritual Nurse
Maid Told You That Christians Are To Be Perpetual Sheep And Children On A Strict Diet Of Milk, You Believed
Him Or Her. (1 Corinthians 3:1,2;Hebrews 5:12-14 )

13) You're Biblically E-Twitterate

Reversing The Dumbing Down Of The Church:
"Developing a sound world-view is essential if one is to live across
the grain of the culture which is our calling. Instead, the church today has mostly defaulted to the prevailing secular world
view! Biblical illiteracy in the church today! Reversing the dumbing-down of the church."
http://ldolphin.org/mirror.html
14) You Are Convinced That 'Discipleship' And Depth Of Faith Is
An Old Concept That Went Away At The Advent Of The Information Age And Fast Food Restaurants. (Daniel 12:4;Timothy 2:2; Philippians 4:9)
15) Your Spiritual Advice Has Been Reduced To Tweets, Chirps And
Bleeps To Twits And Twerps.

Twitter Lingo, Profanity And All
16) Now The Will Of The Ball (in the mouse) Is The Only Thing That Keeps You Going.

17) You Have Clicked 'Allow', To Be Fed Through An I.V. Drip
Without It Going Through The Proper Channels First. (1 John 4:1-3; 2 Timothy 2:15-17; 2 Timothy 3:16-17)

18) Your Spiritual Junk Food Ways Have Enabled Your Mentor To
Be Your Spiritual Junk Food Pusher.
Kirk Cameron Interviews John MacArthur (#1 of 3)
19) You ONLY Scan Points Like These Because
That's All The Time Or Desire You Have And Damn The Green Links Attached.
20) The Head Phones That Were For Truth Interference In Harrison Bergeron Are Now A Reality, Many Years Later After The Book.
Prophetic Has Led To Pathetic
21) Your Multitasking Has Led To A Merge Of Your Interests,
Therefore ...
In The Beginning, The Bases Are Loaded, On Star Can I Think For You, Blessed Assurance,
Sittin On Mine, O What A Saviour Come Rain Or Come Shine...System Crash!...System Crash!!
22) With Your New 'Bluetooth' You Now Resemble Those Folks That Talk To Themselves i.e. The Mentally Ill And Possessed.

23) Trivial Knowledge And Pursuit Has Increased, Wisdom Has Decreased. (2 Timothy 3:6,7)
24) Small Talk Is Now 'All The Talk'.
25) Your Online Theology Has Been Reduced To, Well, Does It Feel
Good 2 U?
Brave New World
26) I Tweet And Twitter Therefore, I Am A Twit.

My Favorite Twit, From Whom I've Learned A Lot Of Putin From.
27) Much Tweeting Has Made U A Bird Brain Content With Only Bird
Food.
28) You Break Into A Cold Sweat And Start Twitching If You Cannot
Tweet Or Twitter On Any Given Day.

29) You Couldn't Give The Order Of The Biblical Books Or Recite A
Bible Verse From Memory If Your Life Depended On It Because All You Know Is Google Searches. (2 Timothy 2:15-17)
30) You've Been Homogenized And Pastorized (Pasteurized) And Your Place In The Big Scheme Of Things Is About As Significant As A Drop Of Milk At A Dairy
Farm.

31) The Boobs Are The Same But The Biggest Boob Tube Is Now The
Computer.
32) Your "On Star, Thinks For You."
Bj Maxwell
10/28/2010
Copyright ©
Twitter, The Original Meaning:
–verb (used without object)
1. to utter a succession of small, tremulous sounds, as a bird. 2. to talk lightly
and rapidly, esp. of trivial matters; chatter. 3. to titter; giggle. 4. to tremble with excitement or the like; be in a flutter.
–verb (used with object)
5. to express or utter by twittering. –noun
6. an act of twittering. 7. a twittering sound. 8. a state of tremulous excitement.
http://dictionary.reference.com/browse/Twitter
Twit:
verb, twit·ted, twit·ting, noun
–verb (used with object) 1. to taunt, tease, ridicule, etc., with reference
to anything embarrassing; gibe at. 2. to reproach or upbraid. –noun 3. an act of twitting. 4. a derisive reproach; taunt;
gibe.
–noun Informal .
an insignificant or bothersome person.
twit 2 (twɪt)
— n informal chiefly ( Brit ) a foolish
or stupid person; idiot [C19: from twit 1 (originally in the sense: a person given to twitting)]
http://dictionary.reference.com/browse/Twit
Very Superficial
Click Here, Then Minimize To Read New Lyrics With Music.
New And Improved Lyrics By Bj Maxwell
Feel Free To Post Unaltered Anywhere.
Formerly Superstition Sung By 'Stevie Wonder'
New Lyrics In Black
Links In
Green 2 Be shepherds of God's
flock that is under your care, serving as overseers--not because you must, but BECAUSE YOU ARE WILLING, as God wants you to
be; NOT GREEDY FOR MONEY, BUT EAGER TO SERVE; 3 not lording it over those entrusted to you, but being EXAMPLES TO THE FLOCK.
4 And when the Chief Shepherd appears, you will receive the crown of glory that will never fade away." (1
Pete 5) 'Professional Christian', To The Tune, 'American Woman' New Lyrics By Bj Maxwell
Feel Free To Post Unaltered Anywhere
Professional
Christian New Lyrics:
Professional
Christian, Tell You Bout His Christ
He's On A Mission, If The Price Is Right
When Paid To Go Fishin, Then
He's Got A Bite
Professional Christian, Narrow Kind Of Sight Super Apostle, Got His Own High Place

Professional Christian, You Can't Have A Taste
Christian
Segregator, Thousand Shades Of Gray. Professional Christian , With Just One Plea
Professional Christian, Will You 'Let Me Be
'Don't Come Round Here Knockin On My Door' Just Want My Dollar, So We're Both Not Poor Don't Muzzel The Ox, That Treads The Corn 'But Ox Won't Move', Til You Bronze His Horns
This Christian Says I Gotta Pay
Professional Christian,
Here What The Bible Say
Short
Instrumental:
Professional Christian, Should Give And Receive
Super Apostle, Set God's Body Free
'Don't Come Knockin' On My Door
'Don't Wanna See Your' Hand Out 'No More' Special Letters Can Hypnotize
Piled High And Deep, It Says Your Wise.
But An Expert In This
Not That Doesn't Make Us Your Welcome Mat.
Instrumental:
Professional Christian,
Says 'Get Away'
Professional Christian, Don't Hear What I Say
You Even Got Your Own
Stage Door
'Don't Wanna See Your' Faith 'No More' I Don't Need Your Whore Machine
Brother Paul Preached Jesus For Free Colored Lights To TantalizeTricking Foolish, Christian's Eyes
'Now'
Christian, You Just Stay Away  (Open Door Fellowship) (Open Door Fellowship)
Professional Christian, You Just Segregate
Go, Gotta Get His Pay, Gotta Get His Pay
'Now Go, Go, Go', I'm Gonna Leave You Christian
Don't Believe You Christian
Why, Why, Why....3x
You Think You're The Man We
Enable You Too

The Eye Can't Say Unto the Hand
I Can Fly And Don't Need You
(1 Corinthians 12:21;Romans 12:4-8;Ephesians 4:1-16;1 Corinthians 12:12-31) It's Give And Receive 
'You know I'm gonna go
It's Give And Receive
'You know I'm gonna go,' Christian  I Can't Believe You Christian
'Goodbye', Professional Christian New
Lyrics By Bj Maxwell Copyright © 01/14/2014; 01/21/2014;
02/07/2014 "But I am afraid that just as Eve was deceived by the serpent's cunning, your
minds may somehow be led astray from your sincere and pure devotion to Christ. 4 For if someone comes to you and preaches
a Jesus other than the Jesus we preached, or if you receive a different spirit from the one you received, or a different gospel
from the one you accepted, you put up with it easily enough. 5 But I do not think I am in the least inferior
to those "SUPER-APOSTLES."
6 I may not be a trained speaker, but I do have knowledge.
We have made this perfectly clear to you in every way. 7 Was it a sin for ME to lower myself in order to elevate you
by PREACHING THE GOSPEL OF GOD TO YOU FREE OF CHARGE?
8 I robbed other churches by receiving support from them so as to serve you. 9 And when I was with you and needed
something, I was not a burden to anyone, for the brothers who came from Macedonia supplied what I needed. I have kept myself
from being a burden to you in any way, and will continue to do so. 10 As surely as the truth of Christ is in me, nobody in
the regions of Achaia will stop this boasting of mine. 11 Why? Because I do not love you? God knows I do! 12 And I will keep
on doing what I am doing in order to cut the ground from under those who want an opportunity to be considered equal with us
in the things they boast about. 13 For such men are false apostles, deceitful workmen, masquerading as apostles of Christ.
14 And no wonder, for Satan himself masquerades as an angel of light. 15 It is not surprising, then, if his servants masquerade
as servants of righteousness. Their end will be what their actions deserve." (2 Corinthians 11:3-15)
"To the elders among you, I appeal as a fellow elder, a witness of Christ's sufferings and one
who also will share in the glory to be revealed: 2 Be shepherds of God's flock
that is under your care, serving as overseers--not because you must, but BECAUSE YOU ARE WILLING, as God wants you to be;
NOT GREEDY FOR MONEY, BUT EAGER TO SERVE; 3 not lording it over those entrusted to you, but being EXAMPLES TO THE FLOCK. 4
And when the Chief Shepherd appears, you will receive the crown of glory that will never fade away." (1 Pete 5) "8 We loved you so much that
we were delighted to share with you not only the gospel of God but our lives as well, because you had become so dear to us.
9 Surely you remember, brothers, our toil and hardship; WE WORKED NIGHT AND DAY in order NOT TO BE A BURDEN to anyone WHILE
WE PREACHED THE GOSPEL OF GOD TO YOU." (2 Thess. 2) "Was it a sin for me to lower myself in order to elevate you by preaching
the gospel of God to you FREE OF CHARGE? 8 I robbed other churches
by receiving support from them so as to serve you. 9 And when I was with you and needed something, I was not a burden to anyone,
for the brothers who came from Macedonia supplied what I needed. I have kept myself from being
a burden to you in any way, and will continue to do
so." (2 Cor. 11) "In the same way, the Lord has commanded that THOSE WHO PREACH THE GOSPEL SHOULD RECEIVE
THEIR LIVING FROM THE GOSPEL. 15 But I HAVE NOT USED ANY OF THESE RIGHTS. And I am not writing this in the hope that you will
do such things for me. I would rather die than have anyone deprive me of this boast. 16 Yet when I preach the gospel, I cannot
boast, for I am compelled to preach. Woe to me if I do not preach the gospel!" (1 Cor. 9) "For the foolishness of God
is wiser than man's wisdom, and the weakness of God is stronger than man's strength. 26 Brothers, think of what you were when
you were called. Not many of you were wise by human standards; not many were influential; not many were of noble birth. 27
But God chose the foolish things of the world to shame the wise; God chose the weak things of the world to shame the strong.
28 He chose the lowly things of this world and the despised things--and the things that are not --to nullify the things that
are, 29 so that no one may boast before him. 30 It is because of him that you are in Christ Jesus, who has become for us wisdom
from God--that is, our righteousness, holiness and redemption. 31 Therefore, as it is written: "Let him who boasts boast in
the Lord." (1 Cor. 1:25-31)
|